

Change Colors of Bars in Graphs in Jmp
JMP
ANOVA
One-Way
-
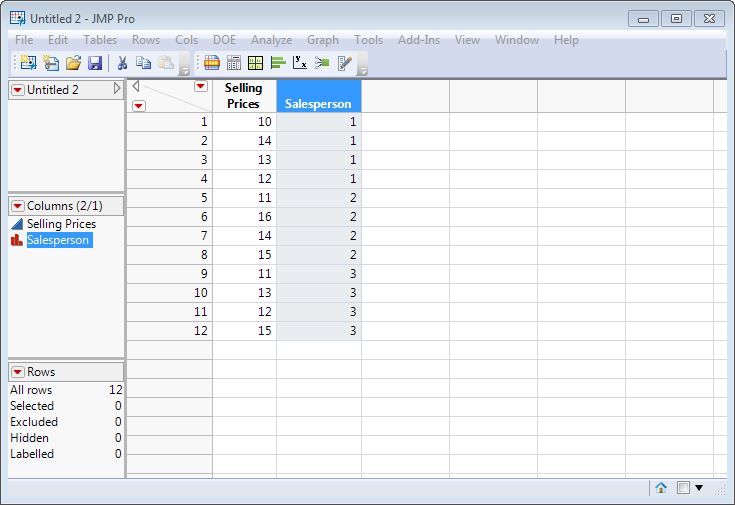
Enter all of the data into Column 1, one column at a time.
-
Under Cols, choose New Columns…
-
In the New Column window that opens, click the dropdown beside Modeling Type. Select Nominal. Select OK.

-
Enter the groups into Column 2 for each data value. Label the columns as fitting.
-
Under Analyze, choose Fit Y by X.
-
Click on the name of your data in Column 1 in the Select Columns box and click Y, Response. Click on the name of your data in Column 2 in the Select Columns box and click X, Factor. Select OK.

-
In the window that opens, click on the Red Triangle and select Means/Anova.

Two-Way
-
Enter all of the data into Column 1, one column at a time.
-
Under Cols, choose New Columns…
-
In the New Column window that opens, click the dropdown beside Modeling Type. Select Nominal. Select OK. Repeat this step to add a third column.
-
Enter the row names into Column 2 and the column numbers into Column 3. Label the columns as fitting.
-
Under Analyze, choose Fit Model.
-
Click on the name of your data in Column 1 in the Select Columns box and click Y. Highlight the names of your data in Column 2 and Column 3 at the same time in the Select Columns box. Click Macros and then Full Factorial. Select Run.


Chi-Square Distribution
Test for Association
-
Enter the data into the table. Name the columns as appropriate.

-
Choose Analyze, Fit Y by X.
-
Click the name of your first variable in the Select Columns box and click Y, Response. Click the name of your second variable in the Select Columns box and click X, Factor. Click the name of the column containing your frequencies in the Select Columns box and click Freq. Click OK.


Note: The second row (labeled "Pearson") under Tests in the output corresponds to the methods used in the texts.
Test for Goodness of Fit
-
Enter the data into the worksheet.

-
Choose Analyze, Distribution.
-
Select your variable in the Select Columns box. Click Y, Columns. Select your Actual Frequency (Observed) column and click Freq. Click OK.

-
Select the Red Triangle beside your variable name. Select Test Probabilities.

-
Enter the claimed probabilities (Expected) under Hypoth Prob. Click Done.


Note: The second row (labeled "Pearson") under Test in the output corresponds to the methods used in the texts.
Confidence Intervals
Minimum Sample Size
-
Under DOE, click Design Diagnostics, and then Sample Size and Power. In the window that opens, click One Sample Mean.
-
Enter your α-level (default value is 0.05) in the box Alpha, standard deviation in the box Std Dev, margin of error in the box Difference to detect, and 0.5 in the box Power. Click Continue.

Proportion
-
Enter the data into the worksheet.

-
Choose Analyze, Distribution.
-
Select your variable in the Select Columns box. Click Y, Columns. Select your Frequency column and click Freq. Click OK.

-
Select the Red Triangle beside your variable name. Select Confidence Interval, and then your confidence level. If your confidence level is not present, select Other and then type your confidence level.


Note: JMP calculates confidence intervals for proportions using the score method.
Standard Deviation
Note: The data used is from Section 3.3 Exercise 9 of Discovering Statistics and Data.
-
Enter the data into the worksheet.
-
Choose Analyze, Distribution.
-
Select your variable in the Select Columns box. Click Y, Columns. Click OK.

-
Select the Red Triangle beside your variable name. Select Confidence Interval, and then your confidence level. If your confidence level is not present, select Other and then type your confidence level.

t-Interval
-
Enter the data into the worksheet.
-
Choose Analyze, Distribution.
-
Select your variable in the Select Columns box. Click Y, Columns. Click OK.

-
Select the Red Triangle beside your variable name. Select Confidence Interval, and then your confidence level. If your confidence level is not present, select Other and then type your confidence level.


Two Sample Proportions z-Interval
-
Enter the data into two columns.

-
Under Analyze, choose Fit Y by X.
-
Click on the name of your data (Column 2) in the Select Columns box and click Y, Response. Click on the groups of your data (Column 1) in the Select Columns box and click X, Factor. Select OK.

-
In the window that opens, click on the Red Triangle and select Two Sample Tests for Proportions.

Variance
Note: The data used is from Section 3.3 Exercise 9 of Discovering Statistics and Data.
-
Enter the data into the worksheet
-
Choose Analyze, Distribution.
-
Select your variable in the Select Columns box. Click Y, Columns. Click OK.

-
Select the Red Triangle beside your variable name. Select Confidence Interval, and then your confidence level. If your confidence level is not present, select Other and then type your confidence level.

-
Right click on the table below Confidence Intervals. Select Make into Data Table.
-
In the new data table that opens, under Cols, select New Co. Name the column Lower CI Squared. Click Column Properties, then Formula.

-
In the new window that opens, click on Lower CI. Click x y . Click OK twice.

-
Repeat Steps 6 and 7, naming the new column Upper CI Squared and clicking Upper CI instead of Lower CI.
-
The values on the row Std Dev in the Lower CI Squared and Upper CI Squared columns are your lower and upper limits for your confidence interval for the variance.

z-Interval
-
Enter the sample mean or raw data into Column 1. If you enter a sample mean, enter the sample size into Column 2.
-
Choose Analyze, Distribution.
-
Select Column 1 in the Select Columns box. Click Y, Columns. Select Column 2 if you entered a mean and sample size in Step 1 and click Freq. Click OK.

-
Select the Red Triangle beside your variable name. Select Confidence Interval, and then select Other. Type your confidence level and check the box labeled Use Known Sigma. Click OK.

-
Enter your known standard deviation in the box that opens. Click OK.


Descriptive Statistics
One Variable
-
Enter the data into the worksheet.
-
Choose Analyze, Distribution.
-
Click Column 1 in the Select Columns box. Click Y, Columns. Click OK.
-
To select additional statistics to be displayed in the Summary Statistics box, click the Red Triangle beside Summary Statistics and then select Customize Summary Statistics. Select the desired statistics and click OK.

-
Two Variable
-
Enter the data into the worksheet, one variable in each column.
-
Choose Analyze, Distribution.

-
Click your first column in the Select Columns box. Hold the Ctrl key and click your second column in the Select Columns box. Click Y, Columns. Click OK.
-
To select additional statistics to be displayed in the Summary Statistics box, click the Red Triangle beside Summary Statistics and then select Customize Summary Statistics. Select the desired statistics and click OK. You will have to repeat this process for both variables.
-
Graphs
Bar Charts
-
Enter the data into the worksheet, one variable in each column.
-
Under Graph, click Chart.
-
Click the column containing your categories in the Select Columns box and click Categories, X, Levels. Click the column containing your data values in the Select Columns box and click Statistics, Data.
-
By default, a vertical bar chart is created. To create a horizontal bar chart, click Vertical in the Options box and then click Horizontal.

-
-
Click OK.
Choropleth Map (County)
Note: For this example, we will use the US County Data found on the web resource.
-
Download the US County Data comma separated value (.csv) file from the web resource.
-
Open JMP. Navigate to where you saved the .csv file from Step 1 and click on the .csv file name. Click the radio button beside Data with Preview. Click Open.

-
In the window that opens, type the row number that the column names are on (in the case of the US County Data, this is row 3) in the textbox beside File contains column names on line. Click Next.

-
Click Import.
-
For JMP to match the data to a map shape, we will need to put the region data (fips) into a form JMP can use. JMP fips data is five digits, including leading zeroes. To do this,
-
Under cols, select New Columns. Name this column fips5. Select Character as the data type. Click After last column and then click Before first column.
-
Click Column Properties. Click Formula.
-
In the left most column, click Character, Right.
-
Click the box labeled text.

-
In the left most column, click Character, Concat.
-
Click in the left hand box, beside the two vertical lines. Type "0", including the quotation marks. Press Enter.
-
Click in the right hand box, beside the two vertical lines. Click Character, Char in the left most column. In the box inside the parentheses following Char, click fips in the middle column.

-
Click in the box labeled n. Type 5. Press Enter. Click OK twice.

-
-
Under Graph, select Graph Builder. Drag fips5 from the Variables box to the Map Shape box. Drag the variable you want to graph onto the map that appears. Click Done.

Histogram
-
Enter the data into the worksheet.
-
Choose Analyze, Distribution.
-
Click Column 1 in the Select Columns box. Click Y, Columns. Click OK.
-
Click on the red arrow beside the variable name and select Display Options, Horizontal Layout.

-
To adjust the class width, click the red arrow beside the variable name and select Histogram Options, Set Bin Width. Enter your desired class width and click OK.

-
Dot Plot
-
Enter the data into the worksheet.
-
Choose Analyze, Distribution.
-
Click Column 1 in the Select Columns box. Click Y, Columns. Click OK.
-
Click on the Red Arrow beside the variable name and select Display Options, Horizontal Layout.
-
To adjust the class width, click the Red Arrow beside the variable name and select Histogram Options, Set Bin Width. Enter your desired class width and click OK.

-
Line Graphs
-
Enter the data into the worksheet, one variable in each column.
-
Under Graph, click Chart.
-
Click the column containing your categories in the Select Columns box and click Categories, X, Levels. Click the column containing your data values in the Select Columns box and click Statistics, Data.
-
Click Bar Chart in the Options box and then click Line Chart.

-
Click OK.
Normal Probability Plot
-
Enter the data into the worksheet.
-
Choose Analyze, Distribution.
-
Click Column 1 in the Select Columns box. Click Y, Columns. Click OK.
-
Click on the red arrow beside the variable name and select Display Options, Horizontal Layout.

-
Click on the red arrow beside the variable name and select Normal Probability Plot.

Multivariate/Multidimensional
*Note, the data set used in these instructions is the OECD Better Life Index 2016 data set available on stat.hawkeslearning.com under Data Sets > OECD Better Life Index 2016.
-
Enter the data into the worksheet, one variable in each column.
-
Under Graph, click Bubble Plot.
-
Click your desired y-variable under the Select Columns box. Click Y. Click your desired x-variable under the Select Columns box. Click X. Click your desired variable for color under the Select Columns box. Click Coloring. Click your desired variable for size of the bubbles under the Select Columns box. Click Sizes.

-
Click OK.
Pareto Chart
-
Enter the data into the worksheet, one variable in each column.
-
Under Analyze, click Quality and Process, and then Pareto Chart.
-
Click the column containing your categories in the Select Columns box and click Y, Cause. Click the column containing your data values in the Select Columns box and click Freq.

-
Click OK.
Pie Chart
-
Enter the data into the worksheet, one variable in each column.
-
Under Graph, click Chart
-
Click the column containing your categories in the Select Columns box and click Categories, X, Levels. Click the column containing your data values in the Select Columns box and click Statistics, Data.
-
Click the Bar Chart Dropdown box in the Options box and select Pie Chart.

-
Click OK.
Scatterplot
-
Enter the data into the worksheet, one variable in each column.
-
Under Analyze, click Fit Y by X.
-
Click the column containing your suspected independent variable in the Select Columns box and click X, Factor. Click the column containing your suspected dependent variable in the Select Columns box and click Y, Response. Click OK.

Stem-and-Leaf Plot
-
Enter the data into Column 1 of a new data table.
-
Under Analyze, click Distribution.
-
Click your variable in the Select Columns box and click Y, Columns. Click OK.

-
Click the red triangle beside your variable name in the window that opens. Click Stem and Leaf.

Hypothesis Testing
Paired Difference
-
Enter the data into the worksheet, one variable in each column.
-
Under Analyze, click Specialized Modeling, and then Matched Pairs.
-
Select each of the two variables in the Select Columns box and then click Y, Paired Response. Click OK.

-
To adjust your alpha level, click the red triangle beside Matched Pairs and then click Set Alpha Level. Click your desired alpha level.

-
z-Test
If Raw Data is Available:
-
Enter the data into the worksheet in Column 1.
-
Click Analyze, and then click Distribution.
-
Select Column 1 in the Select Columns box and then click Y, Columns. Click OK.

-
Click the red triangle beside your variable name. Click Test Mean.

-
Enter the hypothesized mean, and the population standard deviation. Click OK.

If Summary Statistics are Available:
-
Click Help, and then Sample Data.
-
Under Teaching Resources, click the arrow beside Calculators, and then click Hypothesis Test for One Mean.

-
Select Summary Statistics and click OK.

-
Select the type of test based on the alternate hypothesis. Enter the hypothesized mean, sample mean, population standard deviation, sample size, and alpha. Click the box labeled Reveal Decision.

t-Test
If Raw Data is Available:
-
Enter the data into the worksheet in Column 1.
-
Click Analyze, and then click Distribution.
-
Select Column 1 in the Select Columns box and then click Y, Columns. Click OK.

-
Click the red triangle beside your variable name. Click Test Mean.

-
Enter the hypothesized mean. Click OK.

If Summary Statistics are Available:
-
Click Help, and then Sample Data.
-
Under Teaching Resources, click the arrow beside Calculators, and then click Hypothesis Test for One Mean.

-
Select Summary Statistics and click OK.

-
Select t-test. Select the type of test based on the alternate hypothesis. Enter the hypothesized mean, sample mean, sample standard deviation, sample size, and alpha. Click the box labeled Reveal Decision.

Two Proportion z-Test
-
Click Help, and then Sample Data.
-
Under Teaching Resources, click the arrow beside Calculators, and then click Hypothesis Test for Two Proportions.

-
Select Summary Statistics and click OK.

-
Select the type of test based on the alternate hypothesis. Enter the hypothesized difference (the default value is 0), sample 1 count, sample 1 size, sample 2 count, sample 2 size and alpha. Click the box labeled Reveal Decision.

Two Sample z-Test
-
Click Help, and then Sample Data.
-
Under Teaching Resources, click the arrow beside Calculators, and then click Hypothesis Test for Two Means.

-
Select Summary Statistics and click OK.

-
Select the type of test based on the alternate hypothesis. Enter the corresponding statistics in the boxes. Click the box labeled Reveal Decision.

Regression
Linear Regression Fitted Line Plot with Confidence Interval
-
Enter your data in the worksheet.
-
Click Analyze and Fit Y by X.
-
Select the y-variable in the Select Variables box. Click Y, Response. Select the x-variable in the Select Variables box. Click X, Factor. Click OK.

-
Click the red triangle. Click Fit Line.

-
Click the red triangle beside Linear Fit. Click Confidence Curves Fit.

Linear Regression Fitted Line Plot with Prediction Interval
-
Enter your data in the worksheet.
-
Click Analyze and Fit Y by X.
-
Select the y-variable in the Select Variables box. Click Y, Response. Select the x-variable in the Select Variables box. Click X, Factor. Click OK.

-
Click the red triangle. Click Fit Line.

-
Click the red triangle beside Linear Fit. Click Confidence Curves Indiv.

Multiple Regression
-
Enter the data in columns with the variable names as each column name.
-
Under Analyze, choose Fit Model.
-
In the dialog box, click the response variable in the Select Columns box and then click Y. Click each predictor variable in the Select Columns box and then click Add in the Construct Model Effects box. Click Run.


Simple Linear Regression
-
Enter your data in the worksheet.
-
Click Analyze and Fit Y by X.
-
Select the y-variable in the Select Variables box. Click Y, Response. Select the x-variable in the Select Variables box. Click X, Factor. Click OK.

-
Click the red triangle. Click Fit Line.


Sampling
Random Samples
-
Open a new data table.
-
Click Column 1. Click Cols, and then Column Info.

-
In the dialog box that opens, click the dropdown box beside Initialize Data. Click Random. Enter the number of rows desired, the minimum value, and the maximum value. Click OK.


Change Colors of Bars in Graphs in Jmp
Source: https://www.hawkeslearning.com/Statistics/jmp.html
0 Response to "Change Colors of Bars in Graphs in Jmp"
Post a Comment